
The GMI Edu examination system is the list of publication statuses showing the total exam result which is published or pending. To add the exam, exam title, class, section, subjects, date, start and end time, minimum percentage, and the exam’s instruction. Managing questions, mark register, editing, and deleting can allow for super admin in the action column.
Marks Grade:
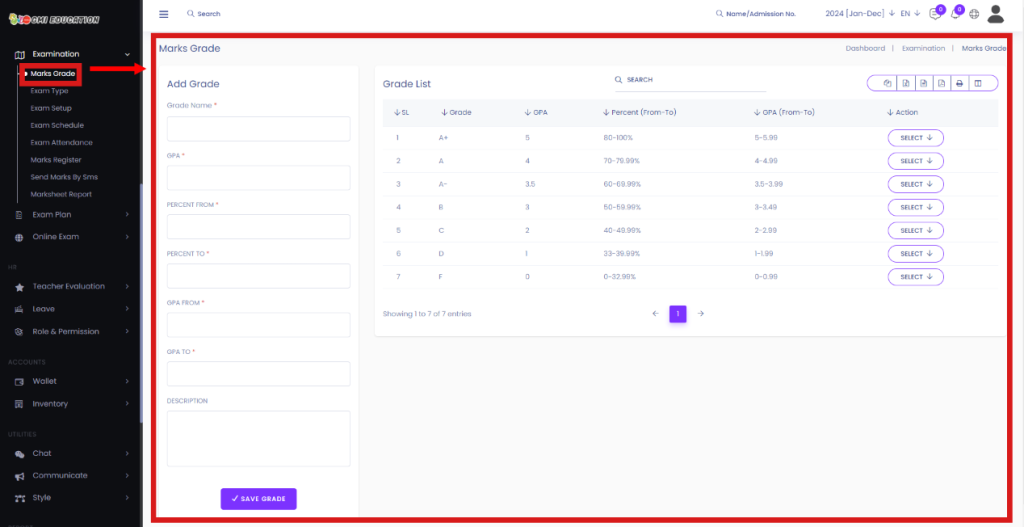
The primary objective of having a grading system is to assess the academic performance of a student. Used by schools all over the world, this technique is considered the most viable medium to analyze a child’s grasping power and reciprocating abilities.
Short Direction: {GMI Edu > Dashboard > Marks Grade > Add Grade > Grade Name > GPA > Percent From > Percent To > GPA From > GPA To > Description > Save Grade > Grade List > SL > Grade > GPA > Percent (From-To) > GPA (From-To) > Action > Select.}
This is the GMI Edu Marks Grade list which includes Grade names, GPA, Percent from, Percent to, GPA from, GPA to, and description.
1- Marks Grade
2- Add Grade
3- Grade Name
4- GPA or Grade Point Average, is a number that indicates how high you scored in your courses on average.
5- Percent From
6- Percent To
7- GPA From
8- GPA To
9- Description
10- Save Grade
11- Grade List
12- SL means serial number.
13- Grade
14- GPA
15- Percent (From-To)
16- GPA (From-To)
17- Action
18- Select for edit & delete.
Exam Type:
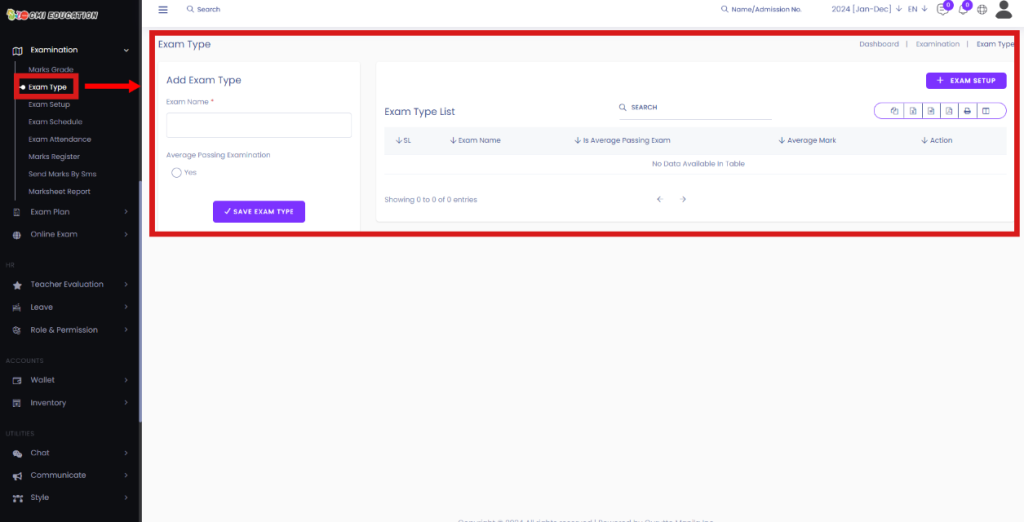
All exam types can be categorized for first-term exams or cover multiple exams, allowing you to create the category of exams.
Short Direction: {GMI Edu > Dashboard > Exam Type > Add Exam Type > Exam Name > Save Exam Type > Exam Setup > Exam Type List > SL > Exam Name > Action > Select.}
If you want to set up your exam section, then go to the GMI Edu dashboard to find the exam type to add a new exam or to set up the exam.
1- Exam Type
2- Add Exam Type
3- Exam Name
4- Save Exam Type
5- Exam Setup
6- Exam Type List
7- SL means serial number.
8- Exam Name
9- Action
10- Select for edit or delete.
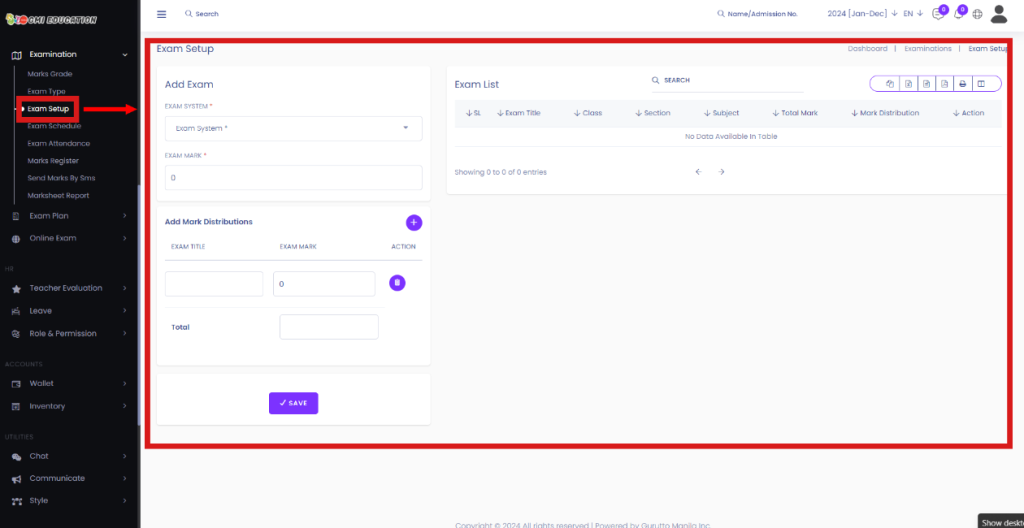
This function is designed for single or multiple exams in which you can select subjects and exam marks. You can also add marks distributed by exam title, marks, or action and hit the save button. Exams can also be added to and shared through Courses or the Academy. Participants can take different Exams in a row from one Course. In the Academy, you can store all the Exams and Courses in one place.
Short Direction: {GMI Edu > Dashboard > Exam Setup > Add Exam > Choose Single or Multi Exam > Select Subject > Exam List > SL > Exam Title > Class > Section > Subject > Total Mark > Mark Distribution > Action > Add Mark Distributions > Exam Title > Exam Mark > Action > Save.}
If you want to set up the exam section on your GMI Edu platform, then go to the Add exam option.
1- Exam Setup
2- Add Exam
3- Choose a Single or Multi Exam
4- Select Subject
5- Exam List
6- SL means serial number.
7- Exam Title
8- Class
9- Section
10- Subject
11- Total Mark
12- Mark Distribution
13- Action
14- Add Mark Distributions
15- Exam Title
16- Exam Mark
17- Action
18- Save it.
Exam Schedule:
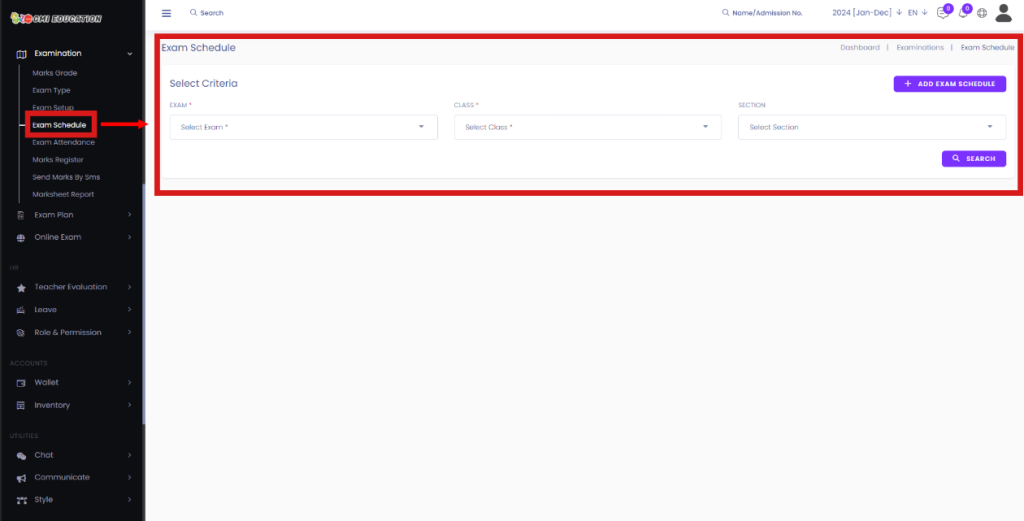
The examination period will be defined by when the assessment is made available to students, and when it closes. We recommend that the assessment be made available for at least a minimum of hours.
Short Direction: {GMI Edu > Dashboard > Exam Schedule > Select Criteria > Add Exam Schedule > First Term > Select Subject > Select Section > Search > Exam Routine > Date & Day > Subject > Class (Section) > Teacher > Time > Duration > Room.}
Exam Schedule, including a word or page limit in the instructions, is essential to ensure students understand what is expected.
1- Exam Schedule
2- Select Criteria
3- Add Exam Schedule
4- First Term
5- Select Subject
6- Select the Section
7- Search
8- Exam Routine
9- Date & Day
10- Subject
11- Class (Section)
12- Teacher
13- Time
14- Duration
15- Room
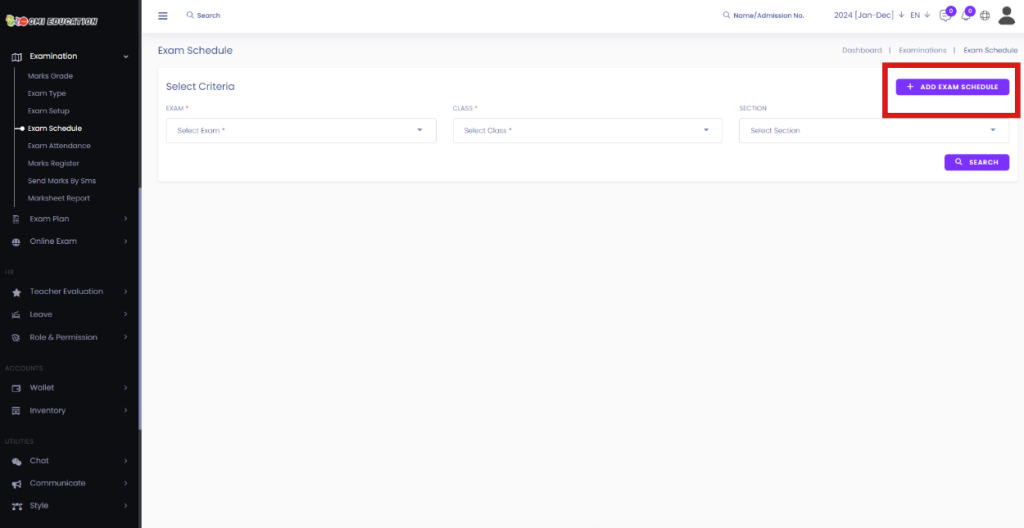
Add Exam Schedule:
A window of availability is allowed for each exam, defining when the student may begin and when they must have finished the exam. The duration of the online exam can be extended depending on the admin setup.
Short Direction: {GMI Edu > Dashboard > Exam Schedule > Exam Schedule Create > Select Criteria > Select the Exam Term > Select Subject > Select Section > Search > Exam Schedule > Add > Subject > Class > Section > Teacher > Date > Start Time > End Time > Room > Action.}
If you want to add the exam schedule to your time limitation, then set the subject, class, section, teacher, date, start time, end time, and room or action.
1- Exam Schedule
2- Exam Schedule Create
3- Select Criteria
4- Select the Exam Term
5- Select Subject
6- Select Section
7- Search
8- Exam Schedule
9- Add
10- Subject
11- Class
12- Section
13- Teacher
14- Date
15- Start Time
16- End Time
17- Room
18- Action for deletion.
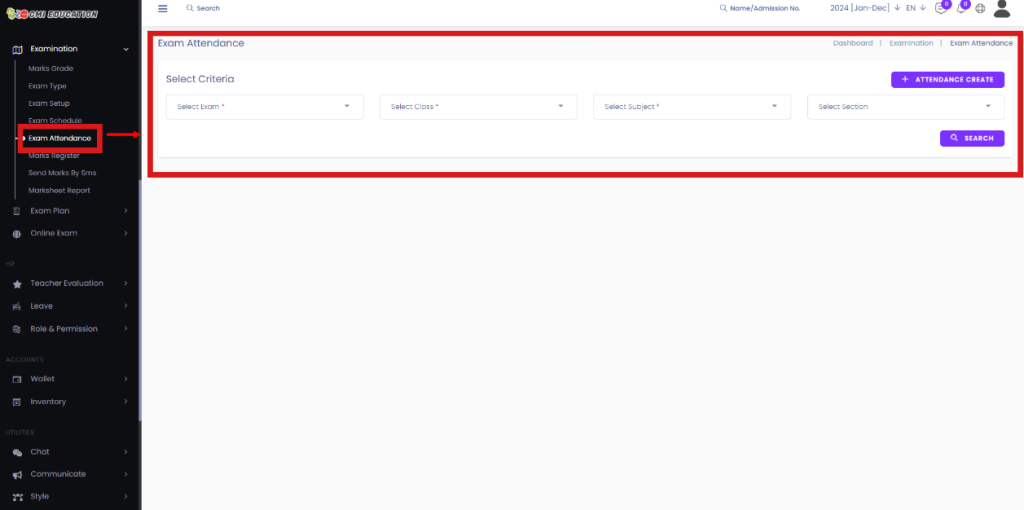
Exam Attendance:
The attendance report is a functionality that allows you to set up the attendance of students and teachers. Teachers can also see the participation of students and include their performance.
Short Direction: {GMI Edu > Dashboard > Exam Attendance > Select Criteria > Attendance Create > Select Exam > Select Class > Select Subject > Select Section > Search > Admission No > Student Name > Class (Section) > Roll No > Attendance.}
User accounts have access to the Attendance menu to see the student status, including who is present or absent.
1- Exam Attendance
2- Select Criteria
3- Attendance Create
4- Select Exam
5- Select Class
6- Select Subject
7- Select Section
8- Search
9- Admission No
10- Student Name
11- Class (Section)
12- Roll No
13- Attendance
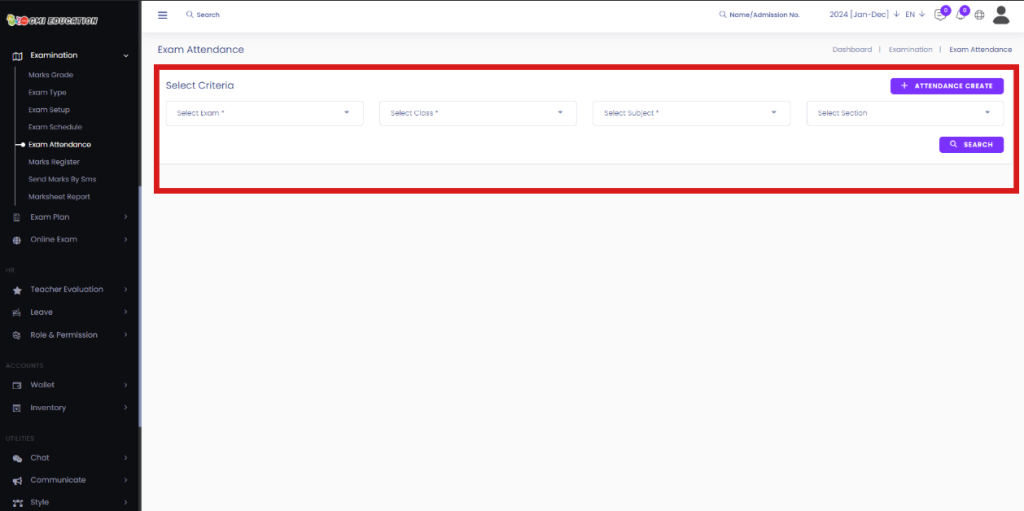
Create Exam Attendance:
Teachers only have access to set up attendance for the exams they have opened. To view the exam attendance report for your sessions, click on the Exam Attendance menu item from the left-side menu. You will see a list of all exam attendance sessions.
Short Direction: {GMI Edu > Dashboard > Exam Attendance > Select Criteria > Select Exam > Select Class > Select Subject > Select Section > Search > Admission No > Student Name > Class (Section) > Roll Number > Attendance > Save Attendance.}
Choose and compare GMI Edu with attendance tracking user activity, extract and analyze data, and identify trends to improve user experience.
1- Exam Attendance
2- Select Criteria
3- Select the Exam
4- Select Class
5- Select Subject
6- Select the Section
7- Search
8- Admission No
9- Student Name
10- Class (Section)
11- Roll Number
12- Attendance
13- Save Attendance
Add Marks:
This is the action for the student marks section, where the number of marks for each subject is shown separately. Teachers can also enter participation scores for the students and include notes on their performance during the session.
Short Direction: {GMI Edu > Dashboard > Marks Register > Add Marks > Select Criteria > Select Exam > Select Class > Select Subject > Select Section > Search > Admission No > Roll No > Class (Section) > Student > Written > MCQ > Teacher Remarks > Is Present.}
If you want to add marks from student examinations, you can separately include subject remarks.
1- Marks Register
2- Add Marks
3- Select Criteria
4- Select Exam
5- Select Class
6- Select Subject
7- Select Section
8- Search
9- Admission No
10- Roll No
11- Class (Section)
12- Student
13- Written
14- MCQ
15- Teacher Remarks
16- Is Present
Send Marks By SMS:
Sending the results of the candidates via SMS facilitates the fast and instant distribution of marks. You don’t need separate software for sending the SMS; this feature comes built-in with the answer sheet checker.
Short Direction: {GMI Edu > Dashboard > Send Marks By SMS > Send Marks Via SMS > Select Exam > Select Class > Select Receiver > Send Marks Via SMS.}
This utility allows the user to send the SMS through an internet connection. Results can be sent to every candidate with just a single click.
1- Send Marks By SMS
2- Send Marks Via SMS
3- Select Exam
4- Select Class
5- Select Receiver
6- Send Marks Via SMS
Setup Exam Rule:
Creating exams for students is one thing, and making rules for exams is another. Both are equally important to your students’ success and testing experience. In addition to common test rules, be cognizant of other rules and mark contributions you may need to include.
Short Direction: {GMI Edu > Dashboard > Settings > Setup Exam Rule > Setup Final Exam Rule > Mark Contribution > Exam Type First, Second & Third Term Total Mark > Exam Term Percentage > Update > Do you want to skip this step for mark register/store? > Merit List Contribution Using > Name of Step > Total Mark, Grade & Number > Update > Result Print Style > With Profile Image, Header Background, Body Background & Vertical Border.}
Whether you’re new to online tests or just looking for new tips, this post will show you how to effectively make rules for online exams that avoid confusion and guide your students to a successful online testing experience.
1- Setup Exam Rule
2- Setup Final Exam Rule
3- Mark Contribution
4- Exam Type First, Second & Third Term Total Mark
5- Exam Term Percentage
6- Update
7- Do you want to skip this step for mark register/store?
8- Merit List Contribution Using
9- Name of Step
10- Total Mark, Grade & Number
11- Update
12- Result Print Style
13- With Profile Image, Header Background, Body Background & Vertical Border.
Format Settings:
It is the most comprehensive exam format section available for importing GMI Edu question dates, signatures, and attendance dates. The question format allows you to quickly import a large number of exam format lists and answers into the platform, which impacts the result card.
Short Direction: {GMI Edu > Dashboard > Settings > Format Settings > Add Exam Format > Term Exam > Select Exam > Controller Title > Upload Signature > Result Publication Date > Attendance > Start Date > End Date > Save Content > Exam Format List > Exam > Title > Signature > Publish Date > Start Date > End Date > Action > Select.}
This is obviously a much faster way and takes significantly less time than manually creating each question date and title.
1- Format Settings
2- Add Exam Format
3- Term Exam
4- Select the Exam
5- Controller Title
6- Upload Signature
7- Result Publication Date
8- Attendance
9- Start Date
10- End Date
11- Save Content
12- Exam Format List
13- Exam
14- Title
15- Signature
16- Publish Date
17- Start Date
18- End Date
19- Action
20- Select for edit or delete.
Position:
This section displays all student results so that teachers can easily find any positions in the report module. If you want to set up the individual results of students, go to the GMI Edu dashboard, navigate to the examination module, and click on the position section.
Short Direction: {GMI Edu > Dashboard > Settings > Position > Position Setup > Select Criteria > Select Exam > Select Class > Select Section > Search.}
There is a student position section that lists the following result sections:
1- Position
2- Position Setup
3- Select Criteria
4- Select Exam
5- Select Class
6- Select Section
7- Search
All Exam Position:
This section is the total result-showing platform where a teacher can set up all exam result positions to be checked in the report module.
Short Direction: {GMI Edu > Dashboard > Settings > All Exam Position > Select Criteria > Select Class > Select Section > Search.}
If you want to check the individual result section, go to the GMI Edu dashboard, find the examination section, and select criteria.
1- All Exam Position
2- Select Criteria
3- Select Class
4- Select Section
5- Search


