
Exam Schedule:
The examination period will be defined by when the assessment is made available to students, and when it closes. We recommended that the assessment be made available for at least a minimum of hours.
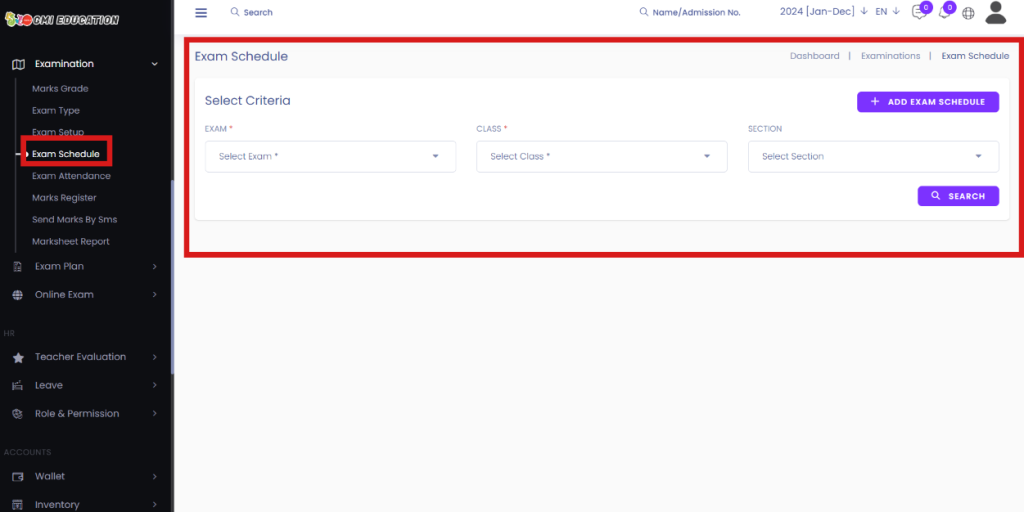
Short Direction: {GMI Edu> Dashboard> Exam Schedule> Select Criteria> Add Exam Schedule> First Term> Select subject> Select section> Search> Exam Routine> Date & Day> Subject> Class (Section)> Teacher> Time> Duration> Room.}
Exam Schedule Including a word or page limit in the instructions is essential to ensure students understand what is expected.
1- Exam Schedule
2- Select Criteria
3- Add Exam Schedule
4- First Term
5- Select Subject
6- Select the section
7- Search
8- Exam Routine
9- Date & Day
10- Subject
11- Class (Section)
12- Teacher
13- Time
14- Duration
15- Room
Add Exam Schedule:
A window of availability is allowed for each exam, defining when the student may begin and when they must have finished the exam. The duration of the online exam can be extended for depends on the admin setup.
Short Direction: {GMI Edu> Dashboard> Exam Schedule> Exam Schedule Create> Select Criteria> Select the exam Term> Select subject> Select Section> Search> Exam Schedule> Add> Subject> Class> Section> Teacher> Date> Start Time> End Time> Room> Action.}
If you want to Add the exam schedule to your time limitation then set the subject, class, section, teacher, date, start time, end time & room or action.
1- Exam Schedule
2- Exam Schedule Create
3- Select Criteria
4- Select the exam Term
5- Select Subject
6- Select Section
7- Search
8- Exam Schedule
9- Add
10- Subject
11- Class
12- Section
13- Teacher
14- Date
15- Start Time
16- End Time
17- Room
18- Action for deletion.


